13 December 2015

Vegan NM Green Chile Posole


Just got my order from Rancho Gordo, and I went straight for the posole/hominy.  They have the best I've ever tried.  A few hours later, here it is...


Ingredients

  • For the Posole:
  • 1 c Rancho Gordo posole, rinsed & sorted
  • 1/4 c mild NM green chile powder (up to 1/3 c, to taste)
  • 1/2 tsp Rancho Gordo Oregano Indio (crumbled to 1/4 tsp)
  • 1/2 small onion, small dice
  • 1 jalapeno, seeded, small dice, OR 1 small can of mild diced green chiles, drained
  • 1/2 tsp garlic powder
  • 1/2 Tbs Massel low sodium vegan 'chicken' bouillon powder
  • 1/2 tsp salt
  • 3 c water
  • 1/3 package Beyond Meat Southwestern Style Chickn Strips (8 strips), diced to the size of the posole
  • For Serving, all optional:
  • 1-2 oz Follow your Heart block vegan cheese (any flavor works well, but use their block cheese made in Greece)
  • Rancho Gordo Rio Fuego Very Hot Sauce
  • chopped fresh parsley or cilantro OR chopped steamed kale
  • OR Vegan Sour Cream

Instructions

  1. Put all the ingredients for the posole except the Beyond Meat into the slow cooker, ending with about 3 c of water. Turn cooker on high for about 3-4 hours.
  2. Check posole for doneness after 3 hours.
  3. When posole is nearing the texture you like:
  4. Add the diced Beyond Meat (preferable at room temp) and cook another hour until the posole is the texture you prefer.
  5. Stir in 1/2c water if you prefer the liquid to be thinner.
  6. SERVING:
  7. Serve the posole in a shallow bowl (I use a pasta bowl). Top with steamed chopped kale, if using. Use a microplane, to shave the vegan block cheese over the posole. Add a few drops of Rancho Gordo Rio Fuego hot sauce.
  8. If not using kale, grate cheese, then sprinkle with chopped parsley or cilantro . Add a few drops of Rancho Gordo Rio Fuego hot sauce.
  9. OR, add a dollop of vegan sour cream, a few drops of Rancho Gordo Rio Fuego hot sauce, top with chopped herbs. Mix, and eat.

26 April 2015

Crispy Tamal


Tamales are one of my absolute favorite foods.  I make them every now and then and freeze them for random lunches.

Rick Bayless has recipes adapted from giant tamales baked in banana leaves, for  a 'tamal'.  I've been making one version for years in a loaf pan and recently came across a different version called a crispy tamal.  This recipe is a veganized, lowered fat variation of that recipe.

Crispy Tamal

3 c masa harina (I use Maseca Masa Para Tamales)
3 Tbs vegan non-hydrogenated shortening or olive oil
1 Tbs Massel vegan chicken boullion powder
2 c warm water
1 1/2 tsp baking powder
1 1/2  tsp salt
2 c vegan chicken stock (I use Massel)
6 -8 oz vegan chorizo, diced
1 c salsa
2-3 c cooked beans, rinsed and drained ( one or two cans)
1 c  fresh or frozen corn kernels (optional)
12" cazuela

Preheat oven to 400F

In a bowl,  add dry masa, salt,  boullion powder and baking powder and mix well.  Add shortening/oil to dry masa mix  and rub together with your hands into it is incorporated with no large clumps.  Add the warm water, mix and set aside to hydrate.

In a skillet, mix the chorizo, beans, salsa and corn if using and warm it up.  Or mix in a glass bowl and microwave until warm.  Set aside.

In a stand mixer, add half the hydrated masa and set to medium speed.  Add about 1 c of the broth.  When it is incorporated, add the remaining masa and another 1/2 c of broth.  There will be 1/2 c broth left over.

When it is all mixed, increase speed and beat until it is very fluffy, maybe a minute.

Take half the masa mixture and coat the bottom and sides of the cazuela.

Add all the bean mixture and spread evenly.

Take the remaining masa and beat it again, slowly adding some of the remaining broth to get it somewhat looser. You may not need all of the broth.

Take the remaining masa and spread over the top of the bean mixture.

Bake uncovered at 400F for 25 minutes.

Reduce heat to 325F, cover and bake for another 30 minutes.

Slice into pie shaped pieces and top with vegan sour cream, guacamole, tomato or your favorite hot sauce or salsa.

Note: you can also add the corn kernels to the masa at the end of mixing for a chewier crust.  Or, you could add them to the crust and the filling.

12 June 2014

Cold Smoking Beyond Meat Chicken Free Strips

One of the hottest new vegan products recently has been Beyond Meat Chicken Free Strips and Beefy Crumbles.  I hesitate to say that it is difficult to tell them from 'the real thing', because the point of Beyond Meat seems to be to make people reconsider what they think of as 'the real thing'.

As good as this stuff is, I like smoked stuff...  So, I smoked it.  And here's how I do it.

Obviously, you can light up your regular grill and cook this over a hot grill with some wood chips.  But, this is an already cooked product.  So, if you want it smoky to use in another dish, grilling it or hot smoking is basically cooking a cooked product, then cooking it a third time in another dish.  This can dry or toughen the product.  Cold smoking eliminates that second 'cook'.

But mostly, it just tastes great.

I use a cold smoker from Mac's BBQ in the UK.  When I bought mine, it was shipped by Smokinlicious in the US with a sample pack of their smoking dust.  I used their dust for a while, and liked it, but now use a different product.

The dust I now use is from A-Maze-N Products from Burnsville MN.  Their dust comes in larger packs, either 1 lb or 4 lbs, ships fast, and includes free shipping over $29.  So, if you order your summer's dust all at once, you can probably get free shipping.  They also sell their own cold smoker, but I haven't tried it personally.  From my dealings so far with them, these seem to be some good people to trade with, so if you need info, I'm sure an email will get you any help you need.  As I write this, they also have a Father's Day discount going, so ask about discounts if you order.

A cold smoker has uses other than just Beyond Meat.  You can also smoke things like Daiya cheese wedges, salt, rice, or even your quinoa.  Smoking Daiya would be somewhat similar to doing the Beyond Meat, but smoking hard, dry product takes much longer.  Rice, salt  and quinoa get a full smoker load, about 8-10 hours.  But trust me, smoked quinoa is a treat.  I also cold smoke my own home-made seitan.

OK, we start with frozen or partially defrosted Beyond Meat Chicken Free strips (which I'll just call chicken from now on).  Why frozen or only partially defrosted?  Well, meat BBQ pit masters say that cold meat absorbs smoke better than warm or hot meat, so I'm guessing the same applies here.  In any event, it saves you the trouble of defrosting it...

A cold smoker generates very little heat.  Any BBQ or outdoor grill you have with a lid and air vents should work for the container aspect.  I suspect you could poke some holes in a cardboard box, and that would work as well. You just need it all covered and air flow.

First step is to fill the cold smoker and light it.  For this application, you only need enough dust for about 90 minutes, so here's how I fill mine.


It will start burning from the lower right corner, and I want it to burn the outside row, which will take about 90 minutes.  I fill the inner row next to it as well because, from experience, I've found this helps keep it burning perfectly.

This cold smoker can be started with a tea candle.  As shown, I attach a piece of masking tape to the bottom.  This makes it easy to pull the candle out and douse it when the smoke starts.  A tea candle burns for hours, and I don't want that residue in my food.

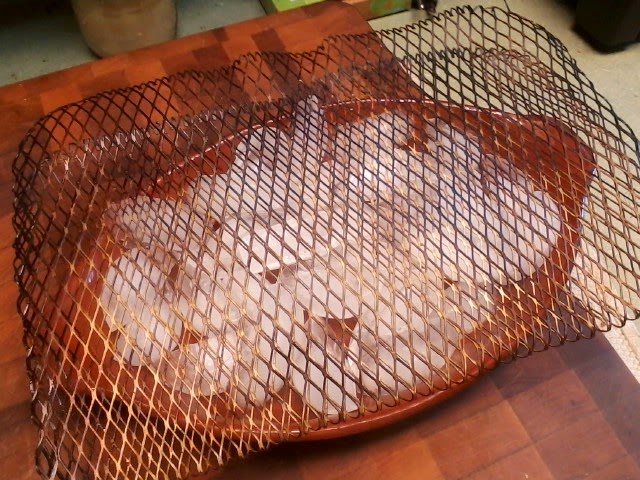
Next step is to prepare the chicken.  First up, I take a cazuela and fill it with ice.  Since the cold smoker generates almost no heat at all, anything will probably work, including plastic containers.


Then I take a grilling sheet and put that on top of the ice.


Load that with the chicken, and you're good to go.


Why the ice, you ask?  Reason one, as mentioned, is the theory that cold stuff takes smoke better, so keeping it cooler should increase the smokiness.  The main reason, though, is to add a little food safety protection to the process.

When keeping food in the 'danger zone' (between 40 °F and 140 °F), there is a possibility of bacteria growing.  While I suspect this problem isn't as much of an issue with vegan products, it is better to be safe than sorry.  The ice keeps the immediate area around the chicken cooler, and therefore, probably safer.  We've already started with only partially defrosted product, so it should stay safe for a while.

The ice needs to be changed probably every 30 - 60 minutes, depending on how warm the day is.  Remember, the air temp might only be 80F, but most grills are black and meant to hold heat, so the temp inside could easily be much higher. I would also suggest not doing this in direct sunlight in the summertime, to keep the inside temps lower.

The USDA says:

Keep Food Out of the "Danger Zone"
Never leave food out of refrigeration over 2 hours. If the temperature is above 90 °F, food should not be left out more than 1 hour.
  • Keep hot food hot — at or above 140 °F. Place cooked food in chafing dishes, preheated steam tables, warming trays, and/or slow cookers.
  • Keep cold food cold — at or below 40 °F. Place food in containers on ice.

And, the temp inside your grill is what matters, not the air temp.  You can read more at the link on USDA above.

Now, to the smoker.  Mine is a Weber Smoky Mountain smoker, but, as mentioned, pretty much anything with a lid and ventilation will work.

If you have a large grill surface, the cold smoker and food can go on the same lever.  On mine, they won't fit, so the cold smoker goes on the level below.  Notice, though, that the food is not directly over the cold smoker, but offset.  You don't want your melting ice causing condensation that drips down on your dust and puts it out.


Put the lid on, make sure there are some vents slightly opened, and wait 60 - 90 minutes.  Check ice every 30 minutes or so.  Since the chicken is already cooked, you can sample it off the grill to see if it is as smoky as you want it.

After 90 minutes or so, dig in.  It's difficult to not just eat the whole batch right off the smoker...  Here's my finished batch.  You can't tell from the photo, but it does have a slightly darker appearance.


And here is Juno, after gobbling her smoked chicken sample down, and hoping for more.


13 November 2013

Not-Your Momma's Queso Sauce


I love tortilla chips and picante sauce.  When Nacho Mom's Original Queso Sauce came to Vegan Essentials, I tried it and liked it, but didn't love it.  But, when mixed with some Pace Picante Sauce, the mixture became better than either of its parts.

The beauty of this sauce is that it is low in calories, no fat, and can be used for a lot of things, like baked potatoes, in pasta sauce, etc.  

Having both Nacho Mom and Pace around to mix became the routine.  Nacho Mom's kept getting more expensive, and then seemed to always be out of stock when I placed an order. One day, the temperature dropped from 56F to 14F in a few hours, and it seemed like a good day to come up with my own sauce.  I expected it to take several tries, but it was actually pretty simple and took less than 10 minutes to do.

This recipe uses regular all purpose flour for the thickening agent, becasue Nacho Mom had flour listed as an ingredient.  However, I have also tried this with tapioca flour and it worked fine.

The recipe calls for two cans of 'RoTel Tomatoes with Green Chiles. Most chain groceries have a cheaper house brand of this product as well.  However, you can use a can of diced organic canned tomatoes and a can of green chiles from the Mexican food section of your grocery.  You could even chop fresh tomatoes, if you wanted.  I have also made this with diced fire-roasted tomatoes and fresh jalapenos, by adding the jalapenos, diced, to the liquid on the stove to soften while it thickens.

Not-Your Momma's Queso Sauce

2 cans RoTel Tomatoes with Green Chiles
water as needed
1/2 c nutritional yeast
3 heaping Tbs of all purpose flour
1 tsp sea salt
1/2 tsp paprika
1/4 tsp cumin
1/4  tsp garlic powder (optional)
1/4 tsp onion powder (optional)
2 tsp Massel Salt Reduced Chicken Bouillon Powder (vegan bouillon powder)

Drain the cans of Rotel into your blender jar and squeeze as much liquid out as possible.  Set the solids aside.

Check the level of liquid in your blender, and add water to bring it to 20 oz (2 1/2 c)

Add all the other ingredients, and blend until the flour is well incorporated.

Preheat a 2 quart saucepan.

Add the blender liquid to the saucepan and cook until it bubbles and thickens, about 2-3 minutes, stirring frequently.

Add the reserved solids from the cans and mix well.

Let cool , then move to a wide mouth mason jar. It will thicken up a little as it cools.  Refrigerate.


06 September 2013


Arugula, Hummus, Daiya Flatbread 


If you are looking for a super-fast, low calorie, healthy yet flavor packed dish, try this flatbread. This is one of my go-to summer lunches.  The cheese, hummus, arugula and balsamic make a terrific combination.  My favorite components are a lavash or FlatOut flatbread, Tribe Classic Hummus, and Daiya Jack Style Wedge, and a good quality Moderna balsamic vinegar.

Arugula, Hummus, Daiya Flatbread 


1-2 hands-full arugula (2 - 2 1/2c)
1 tsp balsamic vinegar
1/2 tsp salt
2 tsp olive oil
1/4 tsp chile flakes, optional
3-4 Tbs hummus, such as Tribe Classic
1 1/2 oz Daiya Jack style wedge cheese, grated
1 FlatOut flatbread, or a lavash trimmed to the size of your plate.

Method:

Take 1-2 hands-full of arugula and toss in a bowl.  Drizzle with balsamic vinegar, olive oil, and the salt. Add the chile flakes, if using.  Toss and set aside for a few minutes.

Take your flatbread and spread it with a thin layer of hummus (preferably one without cumin, such as Tribe Classic). Grate the Daiya cheese evenly over the flatbread.

Quick method: toss the flatbread into the microwave for 30 seconds until the Daiya melts, then proceed.
Slower, crisper method: Heat a 10-12" skillet over medium heat.  When the skillet is hot, add the layered flatbread and heat until the Daiya starts melting, about 3 minutes.  This method makes for a tastier crust.
Quickest method: eat it cold...

Once the flatbread is warm, top with the arugula, drizzling remaining oil and vinegar over the top, and dig in.


05 September 2013


Pimento Cheese, Vegan Style


One of the few things I still miss from my non-vegan days is good old Southern pimento cheese...  It seems that different places in the South have different versions of this classic, but I've tried to recreate the one I used to eat the most.

Pimento Cheese Spread

2.5 oz (1/3 block)  Daiya Cheddar Wedge, grated
3.5 oz (1/2 block) Daiya Jack Wedge, grated
1/3 - 1/2 c (to taste) Earth Balance Mindful Mayo
1 1/2 tsp Annie's Naturals Organic Vegan Worcestershire Sauce
1 2oz jar diced pimentos (Dromedary brand) drained and rinsed
optional:
1/4 tsp ground cayenne pepper
1/4 tsp garlic powder

Method:

Mix all ingredients well and let sit in the fridge for an hour, or better, overnight.   If using Daiya  Cheddar Shreds instead of the wedge cheese, you might need to add a small amount of salt.


16 May 2011

Broccoli Rabe & Chorizo


The local Farmer's Market had some interesting greens this week.  One of my favorites is broccoli rabe.  One of the farmers had some ,and I bought it, but he insisted it was some sort of Asian mustard green.  Maybe so, but if it looks like broccoli rabe, cooks like broccoli rabe, and tastes like broccoli rabe, I'm going to use it as broccoli rabe...

Other greens would work here - kale, mustard greens, collards, gai lan, etc.


This recipe uses a somewhat unusual combination by using some black bean sauce with the chorizo to balance out the flavors.  Very little salt is used in the recipe itself.  I prefer to use a good finishing sea salt at the table, like Maldon's or a grey sea salt.

Broccoli Rabe & Chorizo

1 Tbs olive oil
1/2 onion, diced
1/4 tsp sea salt
2 cloves garlic, minced
3/4 c corn kernels (fresh or frozen)
2 tsp black bean sauce
6-7 oz vegan chorizo, diced
1 bunch broccoli rabe, cleaned
1/4 c vermouth or other white wine

Put a 4 qt pot of water on the stove to boil.
When it is boiling, add the broccoli rabe and blanch for 4-5 minutes
Remove the greens and drain.
When cool, chop the greens into bite sized pieces
 Put a 10 or 12 inch skillet on to heat on medium heat

Add olive oil to skillet
Add onion and saute 2-3 minutes
Sprinkle salt on onion
Add garlic, cook 1 minute
Add corn kernels, cook 1 minute
Add black bean sauce and mix well
Add chorizo and greens and mix well.
Add white wine and cook for 4-5 minutes until everything is very hot, and the greens are cooked

Serve over brown rice and add chile flakes!

13 May 2011

First Harvest Meal, 2011:
Kale Chorizo Stew


The first meal from the garden is always an exciting event.  Today, the Red Russian Kale seemed to have enough large leaves to harvest, so harvest it, I did.

Last year, the kale didn't do very well.  The weather went from hot and wet to cold and wet to more wet, and it languished.  It still tasted terrific, though, and Tae and I ate all of it raw while standing over the container in which it grew.

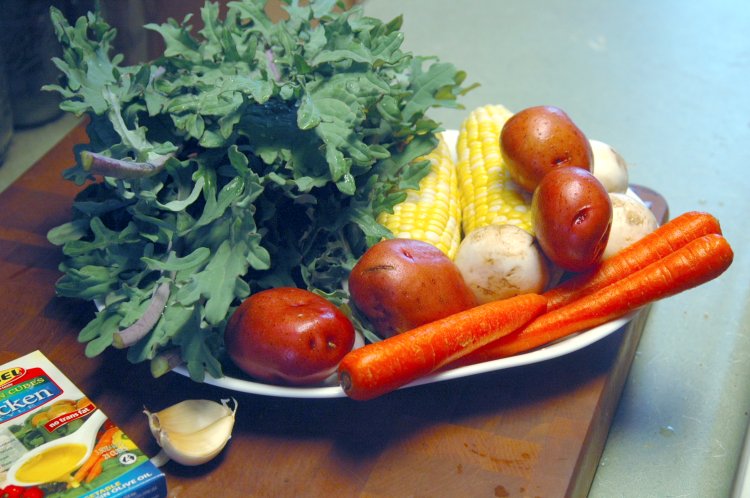
This recipe is more of an assembly guide than it is a proper recipe.  The quantities of each ingredient are totally up to you, and you can add as you wish.  We were out of onions, so there was no onion.  If I had more kale, I certainly would have added it.  The vegan chorizo isn't shown, but here were all the other the ingredients.

I make my own chorizo, vaguely using the chorizo recipe from 'Viva Vegan' as my guide.  'Viva Vegan', is one of the best vegan cookbooks EVER, and I've tried a lot of recipes.  I mostly use them as inspiration and wander off on my own, but it has many, many interesting places to start.

If you don't have your own seitan chorizo on hand, I would recommend the 'Chipotle' sausage from Field Roast.  It was my favorite 'sausage' until I started making my own.

I used fresh corn and used the cobs to start a stock for the stew.  If you have to use frozen, skip the step making the broth and head straight to the Massels.  You might want to add an extra cube if you don't make the quick stock. Without the stock-making step, this recipe only takes 15 minutes or so to make.

As an option on this, try baby bok choi or gai lan (Chinese broccoli) in lieu of the kale, and mix in  1-2 tsp of miso paste right before serving.


Kale Chorizo Stew
serves 4

1 Tbs olive oil
2 cloves garlic, minced
4 c water
2 Massels vegan broth cubes
2 ears of fresh corn

Red potatoes, diced
1 bunch kale, cleaned, stemmed and chopped
3 carrots, diced
mushrooms, cleaned and chopped
corn from the ears
6-8 oz vegan chorizo, diced

Using a sharp knife, remove the kernels form the fresh corn and reserve.
Heat a 6 qt pot
Add olive oil and saute garlic for 30 seconds
Add corn cobs and Massels cubes
Add water
Bring to a boil, reduce heat and simmer 10-15 minutes

Remove cobs and toss in the compost pile
Add kale and potato
Cover, bring back to a boil
Reduce heat and simmer 10 minutes
Add corn kernels, mushrooms, carrots and chorizo.
Cover, bring back to a boil
Reduce heat and simmer 5minutes
Check veggies for doneness

Serve with a sprinkle of chile flakes if desired.  
In the photo above, we served the stew with home made kamut bread and a sprinkle of Daiya Pepper Jack vegan cheese.  And chile flakes, of course.  They go on everything...


24 April 2011

Vegan Crab & Veggie Pasta


A recent 'find' has been Match Meats imitation crab 'meat'. Match Meats is located in St Louis and makes a variety of 'ground meat' substitutes for vegans - chicken, ground beef, sausage, pork and crab. I've used the crab for crab cakes and in sushi and had about half a pack left over in the freezer. So, this pasta dish was born.

Before I was vegan, I wasn't that mad about crab.  We lived along the Louisiana coast at one point and ate a lot of fresh seafood then, but  crab always seemed more trouble than it was worth.  So, I don't know if this really tastes like crab or not.  But it does have a good taste, and I've served it to both vegans and non-vegans and everyone liked it.

I made my own kamut pasta but you can buy it or substitute your favorite ribbon-like pasta. You need however much the box says is 4 servings.

Note that there is no added salt to this dish. The pasta water is salted and that seems enough. If you do want more salt, I'd suggest adding a little of your favorite soy sauce to the crab mixture rather than actual salt.

As an alternative preparation, you could eliminate both the broccoli and arugula, and substitute blanched, chopped broccoli rabe.


Vegan Crab & Veggie Pasta

Pasta - enough for 4 servings
2 Tbs olive oil
8 oz (half pack) of Match Meat Imitation Crab
1 zucchini diced
2 Roma tomatoes, seeded and diced
1/4 c white wine or vegan broth
1/2 tsp garlic powder
1 Tbs Old Bay seasoning
1 tsp sumac powder
2 cups loosely packed baby arugula leaves
3-4 c broccoli florets
Daiya Mozzarella 'cheese' to taste

Start the salted water for the pasta and broccoli
Heat a 10" skillet on low-medium heat

Add the broccoli to the boiling water and cook 2 minutes
Using a slotted spoon, remove the broccoli to a bowl

Add olive oil to the skillet
When the oil is hot, add the crab and break up with a spoon
When the crab is broken up, add the next 5 ingredients, cover and simmer until the zucchini is done to your liking.

Add pasta to the boiling water and cook until barely done
Add the broccoli and arugula to the crab mixture and heat until the arugula wilts.
Combine pasta and crab mixture and mix.
Serve, topped with Daiya Mozzarella sprinkled over the top.


08 October 2010

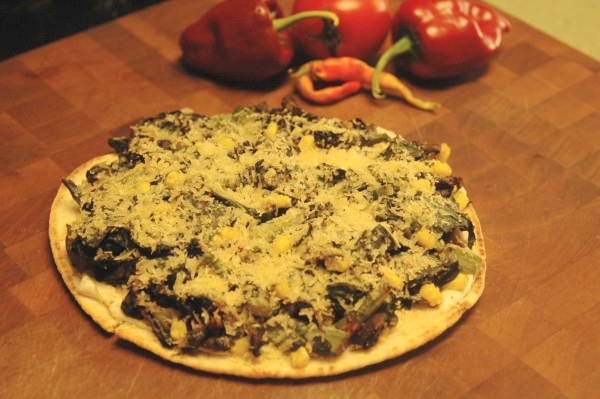
Chinese Broccoli Pizza


Chinese Broccoli Pizza

I love Chinese broccoli (gai lan) - maybe as much as I love broccoli rabe. And neither can be found anyway around where I live. If I drive 90 minutes, I can get gai lan on Thursdays, but that's about it. So, I grew my own.

My first exposure to Chinese broccoli was when I lived in Melbourne. Although I lived in the 'Italian section' of Carlton, my local greengrocer was loaded with Asian vegetables as well. Since I recognized none of them and had no idea what to do with them, I asked the owner and he would recommend things from time to time. Instead of recommending them by flavor, he would recommend them by the health benefit they were meant to provide - low blood pressure, joints, heart health, etc. It was many years ago, but I think Chinese broccoli was meant to thin the blood.

In any event, I was smitten and I'm still smitten with it. I've never seen another Chinese broccoli pizza, but if you try this, I'm confident you'll add it to your repertoire. It is easy to make, and low in added fats and calories compared to most pizzas. I used naan for the base since I have 20 of them in the freezer... A whole naan has about 300 calories and each one will feed 2 people. 

Chinese Broccoli Pizza
2 servings

1 naan
4 stalks or so of Chinese broccoli, rinsed
1 portabella mushroom cap, chopped
1/3 c corn kernels, fresh or frozen
1/8 tsp fresh thyme leaves (leaves from one or two branches only)
1 tsp black bean and garlic
sauce
1 tsp sambal oulek (optional)
1/2 tsp salt (optional)
1 Tbs olive oil
2 Tbs Vegan garlic & herb cream cheese
1 oz Cheezly Garlic Herb flavored vegan cheese, grated

Preheat oven to 400F.
Start a pot of water for your steamer basket.
Preheat a medium sized skillet on low.

Add the olive oil to your skillet and turn the heat to medium-low
Add the mushrooms to the skillet with optional salt
After 2 minutes, add the corn.
Saute the mushrooms until cooked and lightly browned, 3-4 minutes.
Add the thyme leaves to the mushroom- corn mixture and set aside.

Steam Chinese broccoli 8-10 minutes.
Cool broccoli and chop into 2cm pieces

Toss together in a bowl: broccoli, mushrooms, black bean sauce, sambal oulek
For each naan:
Spread the garlic and herb cream cheese lightly over the naan.
Add the Chinese broccoli mixture
Top with grated cheese

Bake for 10-15 minutes depending on your oven. Check after 10 minutes.

Slice into 4 pieces, garnish each with a dollop of vegan sour cream, if desired.


23 April 2010

Not Johnny Carino's Artichoke Angel Hair Pasta


Ok, so I was in Texas for my daughter's wedding and we were going to the groom's parent's house for the rehearsal dinner. I had never met his parents, and had no reason to expect ANYTHING remotely edible for a vegan. I was thinking 37 kinds of barbecue,and very bad Texas beer. The beer part was right, at least that night, but there were actually three things I could eat! Amazing.

They had taken one of the Caesar salads and left it undressed with dressing on the side. They had a veggie-corkscrew pasta salad that was pretty good. And then they had Johnny Carino's Artichoke Angel Hair Pasta. I had no idea who Johnny Carino is, but he makes one mean angel hair pasta. I later found out that it is a restaurant and the hosts had paid $14 a SERVING for it. Could I have possibly eaten $56 of PASTA? The one I had was altered from the restaurant version in that my daughter had asked them to leave out the capers.

The combination of garlic, olives, tomato, artichoke hearts and pasta was absolutely delicious.

Living in the US Midwest can have its challenges. I couldn't find any kalamata olives or any real black olives at all, so had to use the canned 'black olives' made in California. These are disgustingly bad substitutes for real olives and I'm sure no country in the world would allow them except the US. But, I decided I needed them for the photo, so bought a can and used them. Of course, now I found real olives and will use those in the future.

Another problem is that apparently during the winter and spring, the US gets nearly all of its tomatoes from Florida. And Florida decided to freeze one day. Tomatoes are hard to find and very expensive until the summer crops come in. So, I used sun-dried tomatoes in this recipe. I dry my own, but you want proper dried tomatoes, not the stuff soaked in oil or marinated. Just simple dried tomatoes.

If you are in a real rush, you can use a jar or two of marinated artichoke hearts instead of cooking your own and marinating them. However, the marinade for artichokes is very strong and you'd need to make sure you remove as much of it as possible from the artichokes. You can do the frozen ones in 15 minutes of total time, so use them if you can.

Other possible substitutions: if you don't have sumac, add a couple of scrapes of lime zest instead. Don't have brown rice angel hair? Use any angel hair pasta you like. No aleppo pepper? Then just use some chile flakes you would put on a pizza. No Massel's? Use another vegan boullion powder.

On the beer front, at the wedding itself, I had a very good Texas beer called ZiegenBock Amber. It was made a local microbrewery which has recently been purchased by a 'big company', so hopefully they will leave it alone.

Since both Massell's and the brown rice pasta were gluten free, the recipe as I made it was gluten free. If you are cooking gluten free by necessity, though, double check all the ingredients you use.

Angel Hair Artichoke Pasta

Servings: 4

8 ounce(s) Brown Rice Angel Hair Pasta
8 ounce(s) artichoke heart, frozen
1/2 cup(s) black olive, sliced
24 gram(s) Sun Dried Tomato - slices soaked and diced
2 garlic clove diced
1 tablespoon(s) olive oil, extra virgin
1 teaspoon(s) Massel Better Boullion Powder chicken flavor
1 1/2 tablespoon(s) olive oil
3 tablespoon(s) rice vinegar
1/2 teaspoon(s) kosher salt
1/2 teaspoon(s) Sumac - powdered
1/2 teaspoon(s) Aleppo pepper (or chile flakes)

Cook frozen artichokes as the package directs.

Soak the dried tomato slices in fresh water until they soften. Reserve 1/2 c of the soaking water. Then chop finely.

While the artichokes are cooking, whisk together rice vinegar, olive oil, salt and sumac in a medium bowl.

Drain artichokes and mix into the dressing. Leave to marinate.

Start a pot of water for the pasta.

Heat a 3-4 qt saute pan.

Start boiling the pasta

Add extra virgin olive oil to saute pan.

Add garlic and stir for about 30 seconds.

Add sun dried tomato pieces and stir to coat

Remove from heat until the pasta is done.

Drain pasta, reserving 1/2 c of cooking water and 1/2c of the tomato water.

Put saute pan back on heat, add pasta water and bring to a boil.

Add Massel's powder, black olives and drained artichokes

Add pasta and stir in well. Cook about a minute until everything is warm and the pasta absorbs the liquid.

Optional: sprinkle with your favorite vegan parmesan.

Serve immediately.

01 April 2010

Tae's Avocado Spaghetti Squash


This recipe was a result of a challenge from Tae to make an avocado pasta dish. Since I have a half dozen spaghetti squash to use up, I came up with this recipe with the squash instead of pasta. Hopefully, she will approve...


Tae's Avocado Spaghetti Squash

Servings: 4

6 cup(s) spaghetti squash (one large)
1 onion, finely diced
4 chili pepper, Anaheim, roasted, peeled, seeded (or 2 problano)
1 Tbs Turmeric - Fresh, grated, optional
1 Tbs ginger root, grated
1 Tbs olive oil
1 Tbs Earth Balance Original Buttery
1 tsp sea salt
1 c black beans, canned
1 c corn, frozen
2 tomato , seeds removed then diced
1 avocado
1/2 tsp lemon juice

Roast and peel chiles. Dice them and set aside
Finely dice one onion; grate turmeric if using and ginger.
Heat skillet.
Seed and dice tomatoes. Chop avocado into small chunks. Toss tomato and avocado with 1/2 tsp lemon juice. Set aside
Add olive oil and Earth Balance to the skillet.
When the butter substitute is melted, add the chiles and onion and salt. While cooking, start squash.

Cut squash in half lengthways. Remove seeds. Place cut side down in a glass dish. Add 1/4 c of water. Cover with plastic wrap and poke several holes in it.
Microwave squash for about 10 minutes or until soft

When onions are soft, add the black beans and corn and saute 3-4 minutes until heated through.
Scrape the spaghetti squash into the pan and toss to mix and heat.

Pour the squash mixture onto a seving plate and top with the avocado-tomato mixture. Add vegan parmesan cheese if desired.


Nutritional Percentages
Calories 380
Percentage Fat 38.5
Total Fat (g) 16.25
Percentage Carbohydrates 52

Saturated Fat (g) 2.9
Percentage Protein 10.2
Cholesterol (mg) 0
Sodium (mg) 736
Total Carbohydrates (g) 49.36
Sugars (g) 0
Fiber (g) 7.13
Protein (g) 9.67

13 March 2010

Lowered Fat Vegan Brownies


Note: Revised 24 April 2010 to make this easier: increased liquid, increased baking powder, added cider vinegar, eliminated cooking of flour.

This recipe began life somewhere on the internet. Tae found it, changed it, and liked it. She passed her changed version along to me. I wanted to reduce the fat and sugar in the original recipe, so I changed it even more.

This version uses 1/2 c unsweetened applesauce in place of 1/2 c of oil . We also added mesquite powder . Mesquite powder has a cinnamon-y chocolate-y flavor that really boosts the flavor of cocoa and carob flavors. Since its flavor is very strong, use it sparingly. And, there were blueberries in the freezer, so, why not blueberries? But any berry you like will work, and leave them out completely if you want, but you might need to shorten the baking time.

While I admit that I far prefer 'real' cocoa powder to carob powder, I used carob powder and carob chips for two reasons. First, I haven't used carob in ages and wanted to re-visit it. Secondly, kids will be eating the brownies and a large portion of them could end up on the floor. Since the resident canine will definitely go food-surfing, using carob instead of chocolate and cocoa makes it safe for the dog to eat as well.

If you really want to reduce the fat more, leave out the carob chips. Leaving them out reduces the fat per brownie from 4.75g to 1.23g, and reduces the calories from 193 each to 163.


Lowered Fat Vegan Brownies
16 brownies

1 c all purpose flour
1 c fine whole wheat flour
3 Tbs flax meal
2 Tbs mesquite powder OPTIONAL
3/4 c water
3/4 c soy or almond milk
1 1/2 - 2 c sugar (see note)
1 t salt
1/2 Tbs vanilla
1 Tbs apple cider vinegar
3/4 c carob or cocoa powder
1/2 c carob or vegan chocolate chips
1/2 c unsweetened applesauce
1 1/2 t baking powder
1/2 c frozen blueberries (or your favorite) OPTIONAL

Note on sugar: If you are going to add a frosting or eat the brownies with ice cream, or whipped topping, use 1 1/2 c sugar. If you will eat them alone and like very sweet brownies, use 2c of sugar. I use raw sugar instead of white.

Preheat oven to 350F

Grease an 11x7 baking dish

Mix dry ingredients.

Mix wet ingredients.
Combine ingredients and stir as little as possible until mixed.

Spread the mixture into the prepared dish and bake for 45-60 minutes. Start checking the brownies after 45 minutes and bake until a knife comes out clean.


21 February 2010

Mulberry & Orange Flower Water Muffins


Well, the snow has been falling heavily all day and it looks like Juno the dog and I are snowbound. As soon as the city 'plows' the street, the driveway will be blocked with snow 3 feet high. I'm not sure why the city feels that scraping snow from the road into piles to block driveways is a good idea, but it does seem to be our local snow plan.

So, what's there to do other than watch the Olympics and cook? Unfortunately, there was no pre-snow run for supplies, so what we have is all we are going to have.

While looking for some Australian spices for breakfast, I noticed a small bottle of Orange Flower Water that I had purchased and never used. Since flower waters are used in baking, it made me think of muffins, which, along with bread, it pretty much the only thing I ever bake. I have blueberries in the freezer, but the orange flower water is from Lebanon and I remembered that I had dried white mulberries from Turkey in the pantry.

White mulberries are an interesting fruit. The dried fruits look like small pine cones and have a mildly sweet flavor somewhat between a raisin and a fig. They have very tiny seeds which give a very small bit of crunch. They have more protein than most fruits, and also offer anti-oxidants, vitamin C, and iron. And taste great.

The basic muffin recipe I use, from Tae, uses 1/3 c oil in it. I had some unsweetened applesauce in the pantry as well, so decided to substitute that for the oil.

Orange Flower Water is amazingly fragrant. These muffins smell amazing while you mix them, amazing while you bake them, and best of all, amazing while you eat them. The flavor is absolutely delicious and probably different from your run-of-the-mill muffin you normally make. I'm not a fan of icing, so I had mine with a squirt of Soyatoo vegan 'whipped cream'.

You can get white mulberries from Barry Farms, and the orange flower water from The Spice House.

Mulberry & Orange Flower Water Muffins

1 1/4 c all purpose flour
1/2 t cinnamon
3/4 c sugar
1 t baking soda
1 t baking powder
1/4 t salt
1/2 c dried white mulberries

3/4 c soy milk
2 t vinegar
1/2c applesauce
1 T orange flower water


Preheat oven to 350F

Spray a 12 muffin pan with non-stick cooking spray.

Combine dry ingredients
Combine wet ingredients
Mix wet ingredients into dry just until it is combined, then pour into cups. Cups will be about 3/4 full.

Bake 20-25 minutes until a toothpick comes out clean. Check after 20 minutes.

17 February 2010

Southwestern Tofurky Roast


I had apprehensions when I unwrapped my first Tofurky before last Christmas. Expecting something vaguely meat-like, I was confronted with a plastic wrapped softball. I had tried the Tofurky sliced 'smoked turkey' on sandwiches and thought it was pretty good. But a beige softball? Not a good start.

On the package there were two suggested ways to baste to Tofurky while baking it. The orange one sounded like a bad idea for a Christmas turkey, so I tried the other. Unfortunately, althoguh the 'meat' and stuffing was delicious, the basting liquid was salty and used far too much oil. The basting overpowered the quality of the roast itself.

When I had a chance to get another Tofurky at a discount, I jumped at it and now wish I had bought a lot more of them. The package says it has 5 servings, but I was able to eat one 'roast' for days.

In an attempt to add a basting liquid to the roast that was as good as the 'meat', I decided to replace most of the oil with hidden liquid flavor. I roasted some poblano chiles long enough to remove the skin and seeds. I scored the tofurky very lightly and rubbed it with a teaspoon or two of oil. Then I rubbed about a tablespoon of chipotle powder on it. The Tofurky was then wrapped in the poblano chiles and aluminum foil and then baked.

The result was a super tender, very tasty, very juicy Tofurky roast that even offered up some pan juices. Sorry, Tofurky package recipe-writer-people. I win this one big time.


Southwestern Tofurky Roast

1 Tofurky, defrosted as per manufacturers directions
3 large poblano chiles
2 tsp olive oil
1 Tbs chipotle powder

Note: if you want even less heat than a poblano, you could use 6 or so Anaheim (Hatch) chiles instead, or even regular bell peppers as long as you roast and peel them

Preheat oven to 350F

Using a gas burner or your broiler, blister the skin on the poblanos, and set them aside, covered, for 15 minutes.

Peel the poblanos and remove the stem and seeds.

With a sharp knife, carefully remove the roast from its package.

Carefully and very lightly score the roast on all sides.

Rub olive oil over roast

Rub chipotle powder over roast.

Lay out a large sheet of aluminum foil and lay one poblano in the center. Add the roast on the poblano. Drape the other two poblanos over the sides and wrap up firmly in the aluminum foil.

Wrap the entire ball in another layer of aluminum foil and put in a shallow oven proof dish.

Bake for 90 minutes.

When serving, open the foil and remove the poblanos to the side. Remove roast and slice. Serve slices over pieces of the roasted poblanos. There will be several tablespoons of 'pan drippings' in the bottom of the foil, so spoon that over the slices.

09 February 2010

Kate's Methi Curry


Day after day, Tae raved about an Indian curry that her roommate, Kate, was making for them. She called it 'Kate's Methi Curry'. I had never heard of methi and had no clue what it was. Tae said is was a fresh green herb and the recipe called for 2 bunches of it. They are living in an area with a diverse ethnic mix, and have access to an array of fresh produce that makes a snowbound Midwesterner like me drool...

After a few days, Tae emailed the recipe to me and I went in search of 'methi'. Any dish that makes Tae rave like that really has to be spectacular. I had no luck finding any source for fresh methi leaves, even online. Finding dried leaves turned out to be pretty easy. One email to the online Indian store I use, Indian Blend , and they sent me the links to various versions of methi, which turned out to be fenugreek leaves. A few days later, India Blend had dried fenugreek leaves, fresh ginger, fresh turmeric and tons of garlic sitting on my doorstep.

If you want your potatoes to hold their shape, choose yukon gold or red ones. White potatoes are fine (and what I use) but they tend to fall apart if you stir them too much.

The traditional recipe uses potatoes as the vegetable. With this recipe, I have added optional vegetables. When I last made it, I had lovely fresh Brussels Sprouts, so added those. I also had some cauliflower that needed using up, so I used the florets of half a head. You might also consider broccoli, several types of potatoes, baby onions, green beans, or whatever you like. If you aren't interested in a traditional dish, the sky is the limit.

I use fresh turmeric in this, and if you can get it, strongly advise that you use it. Be careful, because it will stain anything instantly, but is well worth the trouble. It has a totally different flavor and texture than the powdered yellow stuff in a jar. Would you make a tomato sandwich with a re-hydrated dried tomato powder instead of a ripe fresh tomato, if you had the fresh available? Fresh and dried turmeric are that different.

I cut the salt in the original recipe from 3 teaspoons to 2 teaspoons in this version. When I make it for myself, I only use a single teaspoon. There is so much flavor in this mixture, you really won't miss the salt.

There is nutritional information from Menu Magic for this recipe at the bottom but it should be used only for general guidance, and does not include the extra vegetables or the brown jasmine rice I strongly suggest you serve this over.

I made a few changes in the recipe to reflect what I had or what I had access to, so if you love the recipe, all the credit goes to Kate; if you hate it, it's my fault. This recipe is superb, and a great change from a lot of our ordinary American dinner food. I haven't met Kate, but thanks for the recipe!

Kate's Methi Curry
Servings: 6

1 onion diced
3 garlic clove minced
2 tablespoon(s) ginger root, grated
2 tablespoon(s) canola oil
3 tablespoon(s) Turmeric - Fresh grated or 2 tsp dried
1 1/2 pound(s) red potato diced
2 jalapeno finely diced
2-3 c chopped vegetables (optional: cauliflower, broccoli, eggplant, green beans, etc)
1 teaspoon(s) chili powder
1 teaspoon(s) cumin powder
1 teaspoon(s) coriander seeds, ground
2 teaspoon(s) salt
4 tablespoon(s) Fenugreek Leaves Dried - Methi

In a large non-stick pot, heat oil
Add onion and garlic and saute several minutes.
Add turmeric and potato and saute 2-3 minutes
Add all other ingredients EXCEPT the methi/ fenugreek leaves
Add 1/4 c water
Cook the curry over low medium heat until the potatoes are cooked through.
Add water 2 Tbs at a time if it starts to stick. The potatoes should NOT brown, just cook .
When paotaoes are done, add methi and another 1/4 cup of water.
Mix well and cook another 5 minutes
Serve over jasmine brown rice

*************************
Nutrition Facts
per serving Nutritional Percentages
Calories 225 Percentage Fat 22.8
Total Fat (g) 5.69 Percentage Carbohydrates 68.6
Saturated Fat (g) 0.36 Percentage Protein 7.9
Cholesterol (mg) 0 Sodium (mg) 978
Total Carbohydrates (g) 38.61

29 January 2010

Daiya Eggplant Parmigiana


This recipe is a vague offshoot of a Mario Batali recipe. In that recipe, he bakes the eggplant first before assembling the parmigiana, thus eliminating the frying step. I personally find eggplant parmigiana with fried eggplant to be far too greasy and this technique eliminates the problem.

This is a fairly simple recipe and shows the excellence of Daiya cheese to real advantage. This would also work fine with Teese vegan mozz, but I think the Daiya is as close to real mozzarella as you could get here.

The red wine in the sauce is optional, but recommended. I used a California zinfandel in this dish and it was excellent. Any dry red wine that isn't heavily oaked should work fine.

A salad goes very well with this dish. I had an organic herb salad with Amy's Tuscan salad dressing. Any of the Amy's vegan dressings would be fine, but the sharpness of their Tuscan is especially nice with this. Eggplant parmigiana has a very rich mouth feel and the vinaigrette cuts that nicely.


Daiya Eggplant Parmigiana

2 medium eggplant
salt
pepper
ground coriander
olive oil

1 small onion diced
3 cloves garlic, minced
1 serrano chile, minced, optional
1/2 t marjoram, dried
1/2t thyme, dried
1 t raw sugar
3 c vegetable juice (low sodium)
1/2 c red wine (optional)
1 t salt
1/2 c panko bread crumbs
1 c Daiya 'mozzarella' cheese
2 T vegan parmesan cheese
1 Tbs cornstarch
3 Tbs water

Preheat oven to 450F.

While oven is heating, wash and slice eggplant into 1 inch slices. If you prefer it peeled, peel before slicing.

Lay eggplant in a single layer on a baking sheet and lightly sprinkle with salt, pepper, and ground coriander seed.

Drizzle very lightly with olive oil.

Bake eggplant for about 10 minutes

While eggplant is baking, sweat onion and garlic and chile, if using, in a 2-3 qt saucepan until translucent.

Add marjoram and thyme and stir.

Add juice and red wine, if using, and bring to a low boil.

Boil juice until it is reduced by 1/3 to 1/2 of its volume, reduce to simmer.

Mix cornstarch and cold water in a small bowl.

Add to the juice and stir until juice mixture starts to thicken, maybe 30 seconds, then remove from the heat and set aside.

Remove eggplant from oven and reduce heat to 350F.

Put 1/2 the eggplant into a layer into an 8x11 pan.

Sprinkle the layer with 1/2 the Daiya cheese, half the vegan parmesan cheese and several ladles of sauce.

Make a second layer and repeat. it is not necessary to use all the sauce. Use as much as you like, but it is excellent with bread.

On top, sprinkle the panko bread crumbs. Optionally, lightly drizzle some olive oil over the top.

Bake for about 20-25 minutes until sauce is bubbling and the top is turning golden and crunchy.

Serve with a salad and plenty of good bread to sop up the sauce.

18 January 2010

Mofongo


While I don't pretend to know anything about authentic mofongo, I have read about it and it is a flavor combination that seems like a great idea. Anyone who has had plantains as tostones or plantain chips knows that these are NOT just a really big, really ugly banana. They are a starchy food that can be used from its green state with no sweetness to a totally black state with a lot of sweetness.

For this recipe, I used a plantain that was nearly yellow and just slightly green but a yellow one with some black spots would also be fine. It is very easy to make and very quick if you use canned peppers.

I add a poblano pepper under the plantain and bean to give another level of flavor. Poblano peppers have little heat to them but if you are worried, you could also roast a green or red bell pepper. If you are really in a hurry, just use some chopped red bell pepper from a jar or green chiles from a can.


Mofongo
makes 2 servings with other side dishes

2 poblano chiles (if using)
1 large plantain
5-6 cloves of garlic, unpeeled
1 c cooked beans
1/2 tsp salt
1/2 tsp cumin

Blister, peel and seed your poblano peppers, if using. Roughly chop and set aside.

Heat a stainless or hard anodized skillet over medium heat. do not use a non-stick pan. Non-stick pans can give off harmful fumes when used like this

Toss your garlic cloves onto the skillet and let them pan roast in the dry pan. Turn them every minute or so. Cook them until they are soft when squeezed with your tongs.

While the garlic is going, take your plantain and cut off both tips. Carefully, cut a slit on either side of the plantain just through the skin. Wrap in a paper towel.

Microwave about 2 minutes and check if for softness. If not soft, turn it over and microwave another minute and check. Continue until it is soft when you squeeze it.

When the garlic is soft, remove to your cutting board.

Add the beans to the skillet with the cumin and heat them.

Peel the garlic and toss them into a mixing bowl. Using your fork, smash them up. When the plantain is finished, peel it and add it to the bowl, smashing it up with the garlic. Add the salt and mix.

To serve: place chopped poblanos on the plate. Add the plantain mixture over it. Spread the plantain mixture to make a hole in the middle and add the beans. Serve with a squeeze of fresh lime.

05 January 2010

Rustic Blue Corn Tamal


I love tamales but nearly all of them have meat or lard in them, so, I learned to make my own. They are a fair bit of work but really not difficult. However, there is an easier version that Rick Bayless calls a 'rustic tamal'. These are like a 'super tamale' and are traditionally baked wrapped in banana leaves. I don't know about you, but I have never even seen a banana leaf for culinary use, so I'll stick to good old aluminum foil.

I have often seen Bobby Flay using blue corn masa on Iron Chef but have never seen anywhere to buy it. Blue corn masa is not the same as blue corn meal. Masa is dried corn which has gone through a process involving lye/wood ash and it removes the outer skin and releases some of the nutrition of the corn that would otherwise not be available to your body. I was happy to find some from NM, at Jane Butel's Cooking School.

The day the masa arrived, I had already planned to make a dish based on Missouri Native Americans' use of corn, squash and beans together in a stew. Why not mix the two ideas and have a native type stuffing for the tamal?

The Native Americans also used buffalo fat, but we're vegan here, so that is definitely out... In fact, most tamale/tamal recipes call for quit a bit of lard, which, even when you substitute vegetable shortening is, in my opinion, way too much fat. The normal recipe for this would call for at least a cup of shortening. I have trimmed that down to about 1/3 of a cup.

You only need a small winter squash for this, or you could use leftover squash. I used a Sweet Dumpling, but delicata would also be excellent in this, or Heart of Gold.


Rustic Blue Corn Tamal

dough:
2 c blue corn masa
2 c stock, divided
1 t baking powder
1/4 c shortening
2 T olive oil

Filling:
1/2 c corn kernels, fresh or frozen
1 c cooked beans, drained
1 c small winter squash
1 t salt
1 t chile powder
1/2 c Daiya cheddar cheese (optional)

Preheat oven to 375F/190C

Spray a 5x7 loaf pan with cooking spray and set aside.

Hydrate your masa by adding the masa to a mixing bowl with 1 1/4 c cool stock. Mix well so all the corn is damp. Set side 5 minutes.

Take your winter squash and cut it in half lengthways. Remove seeds and place halves cut side down on a microwavable dish.

Add 1/4 c water, cover with plastic wrap and poke 2 or 3 slits in the plastic. Microwave for about 6 minutes until fully cooked. Uncover and set aside to cool a little.

While the squash is cooking roll your masa into a ball and set on the chopping board. Add the shortening, oil and baking powder to the bowl. On a low speed, use your mixer to froth up the fats and baking powder. Add the masa back to the bowl as your beat it together, adding more cool stock as needed to keep it soft. Continue until all the masa is incorporated.

Put masa in the fridge until it is needed. Leave the mixer out.

Heat a 10 inch skillet over medium heat. Add the beans and corn and a little of the leftover stock. Take the cooked squash and using a spoon, dig out about a cup of small bites or balls of squash. When the beans are hot, add the squash, chile powder and salt, mix well, and turn off the heat.

Remove the masa from the fridge. If it has firmed up some, add a little more stock and beat it some more. Corn doesn't have gluten, so you don't have to worry about over-beating it. The masa mixture should be soft and not quite as runny as a muffin batter.

Take half the masa and put it into the loaf pan. Using the back of a silicon spatula or spoon, spread the masa all along the bottom, into the corners, and start pulling it up the sides. You want it to look like a masa bowl inside.

When you have the bottom layer, add the cheese, if using, then pour the filling into the middle of the loaf pan and spread it out. Press it down slightly so the top surface is flat.

Add the rest of the masa and spread it evenly over the top.

Cover with foil.

Bake for 30 minutes.

Reduce oven temperature to 325F, 165C and bake another 30 minutes.

Remove foil and bake another 15-30 minutes until the top feels crunchy and firm and the sides have pulled away from the pan.

Dump the loaf pan out onto a plate for easier slicing. Serve a slice over greens with garnishes of vegan sour cream, salsa, guacamole, or chopped chiles.

08 December 2009

Colcannon


Ok, I admit it. I watch Diners, Drive-Ins, and Dives. I avoided it for a season or two but when they went to New Mexico on several shows, I had to watch. I love New Mexico and the food there.

A few shows ago, Guy Fieri was at some joint that makes hash out of all sorts of things. I didn't really care much except that one of the hashes they were making seemed to be a kitchen sink sort of recipe. They tossed in all sorts of things including broccoli rabe and something called colcannon.

The word colcannon was vaguely familiar. I knew it was Irish, but didn't know what went into the dish. The traditional version includes pork, mashed potatoes, and cabbage with onions. Obviously, the pork was out in a vegan version, but the combination sounded nice in my head.

As we wait for the first major snow storm of the season, it seemed like a perfect day to develop a colcannon recipe of my own.

My version uses store-bought cole slaw mix and the entire thing can cook in one skillet and a steamer pot. If you need the pork flavor, you can add Bacon Salt in place of the chipotle powder or paprika that I use in the recipe.

Leftovers can be refrigerated and formed into patties the next day. Fry them in a skillet with a little olive oil until heated through and the outside is brown - delicious!

Colcannon
4-6 servings

4 medium potatoes, peeled and in a 1 1/2 inch chop
2 garlic cloves, peeled
1 1/2 large onions, sliced
1/2 tsp thyme
3 c cole slaw mix
1/4 c Earth Balance 'butter'
1/4 c soy or almond milk
1 1/2 tsp chipotle powder OR smoked Spanish paprika
salt
freshly ground black pepper
Daiya cheese to garnish, as desired

Bring your pot of water to boil and place the potatoes and garlic cloves in a steamer basket. Steam about 18 minutes or until a fork enters the potatoes easily

While that steams, heat 2 Tbs olive oil in a 12 inch skillet, add the onions, 1 tsp of salt and the thyme, and saute slowly until they carmelize

When the potatoes are ready, remove the steamer basket with the veggies and dump into a food mill. Mill potatoes and garlic using the large holes into a large mixing bowl.

Add 1 Tbs salt to the steamer water and bring back to the boil.

Add the cole slaw mix to the boiling steamer water and cook about 6 minutes. Drain well.

Add the onions and cole slaw to the mixing bowl with the Earth Balance, soy milk, chipotle powder and black pepper. Mix as little as possible to combine. Taste for salt and add as needed.

Serve with Daiya cheese sprinkled on top.